As the number of mobile Internet-connected devices continues to rise, so does the number of public-WiFi access points. “WiFi” window stickers are all over the place, advertising a “bonus” reason to stop by your local coffee shop, bookstore or Home Depot. While this may make multi-task shopping easier, it also exposes your activities to anyone else on the public network. All browsing data is broadcast to everyone on the public network who wants to see what you’re up to. To remedy this, you can create an encrypted SSH tunnel to a computer at home. The tunnel encrypts all of your web browsing data and sends it home first. The home computer then completes the browsing request and forwards the results back through the encrypted tunnel to your mobile device. This gives you the same security you’d have if browsing from your couch at home. This post explains how to setup a SOCKS proxy for an Android device without root.
NOTE: There are better solutions for rooted Android devices, but this article assumes you don’t want to root your device. You can also use this article as a guideline to setup non-Android devices with similar software. After a long search for a non-root encrypted proxy solution, I found articles on michaelchelen.net and calgarytech.blogspot.com that allowed me to do and write the below.
What you’ll need:
- A Linux server or desktop that you can connect to remotely using SSH
- An Android phone or tablet
Step 1: If you have a dynamic IP address for the Linux machine, first setup dynamic DNS so you can always get back to your server. Otherwise, you’ll need to write down your IP address every time you leave the house. Here’s an old Wired article that still seems relevant, though the recommended DynDNS.com is no longer very “Free”.
Edit: DynDNS has axed their free service completely.
Step 2: On your [Android] device, download and install ConnectBot and Firefox.
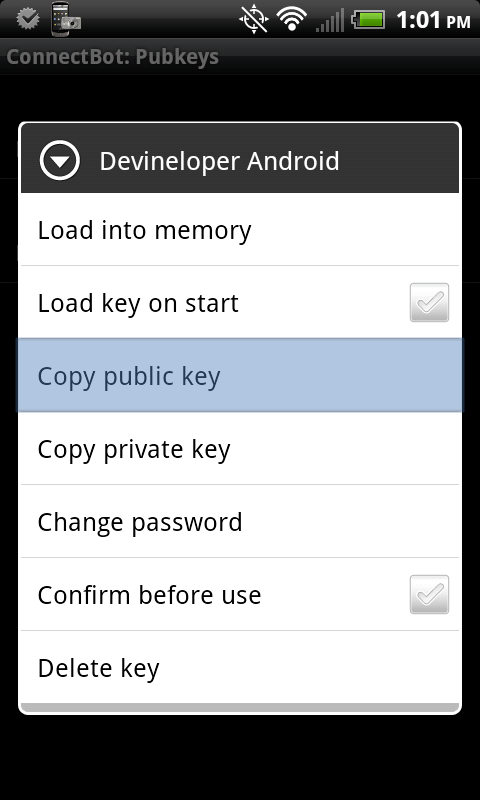
Step 3: Open ConnectBot and generate a public/private key pair. You’ll use the keys to login to your server without having to enter a password every time. To generate a key pair, hit menu and select “Manage Pubkeys”. Then hit menu again and select “Generate”. You’ll be prompted to setup your key details. The settings are up to you. If you set a password for your key pair, you’ll be prompted to enter it to unlock the key the first time you want to connect to your server. Hit “Generate” when you’re done with your settings to generate your key. You’ll be prompted with a blue box to help randomize the key. Just move your finger in a random manner in the blue box until it starts to generate your keys. Once complete, you’ll see the nickname you gave your key, along with a red lock icon.
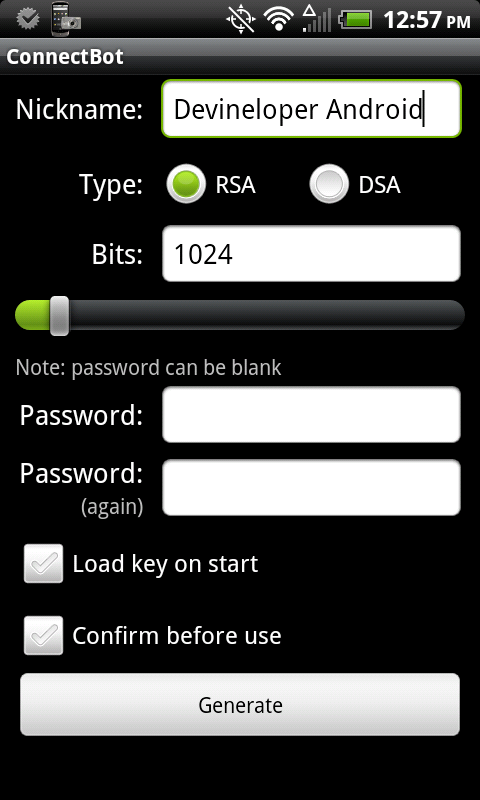
Step 4: In ConnectBot->Manage Pubkeys, long press on the key you generated in step 3 until a menu appears, then select “Copy public key” to copy the public key to memory. You’ll paste this onto your SSH server in step 6 to avoid having to enter a password. You can also optionally unlock your key here by tapping the red icon and entering your password. If you don’t, you’ll have to enter it the first time you try to connect to your server using your key.
Step 5: Create a connection to your Linux server using ConnectBot. Just enter your username@yourURL:port in the box at the bottom of the main screen and hit the enter key. Enter the password for your username when prompted and hit the enter key again to complete the connection.
Step 6: (Optional) Copy your public key to your Linux server to avoid having to enter your password in the future. After you connect in step 4, enter the following, making sure to paste the public key you copied in step 3 by hitting Menu and “Paste” (Keep the quotes shown below):
echo "YouPublicKey" >> .ssh/authorized_keys |
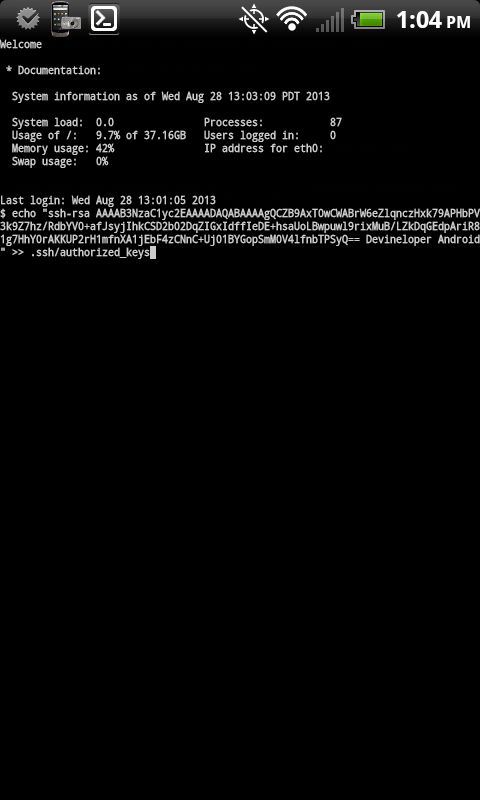
After you copy your key, type exit or hit menu and select “Disconnect”. Then try to connect again. You shouldn’t be prompted for a password.
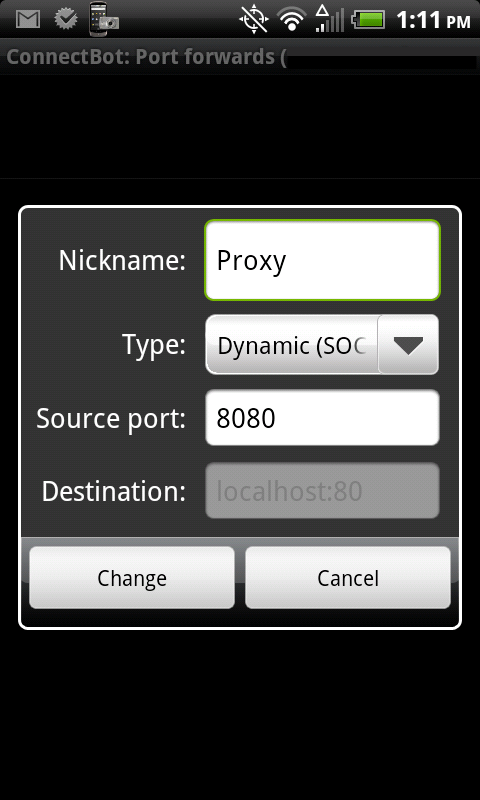
Step 7: Hit Menu and select “Port Forwards”. Then hit Menu again and select “Add port forward”.
- Nickname: Anything you want
- Type: Dynamic (SOCKS)
- Source port: 8080 (Make sure you enter a port. The default is greyed out and just a placeholder. If you don’t enter a port, your Port Forward will disappear and you’ll be left scratching your head as to why)
- Tap “Create port forward” and make sure you see your new port forward listed. If not, double-check that you entered a port.
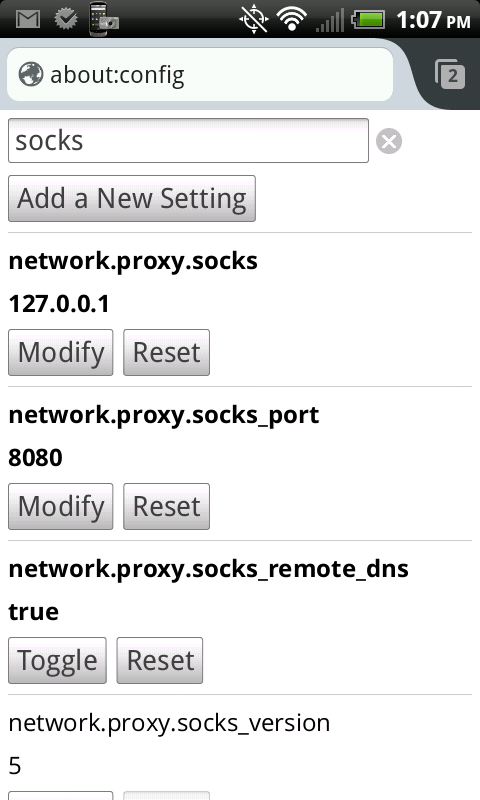
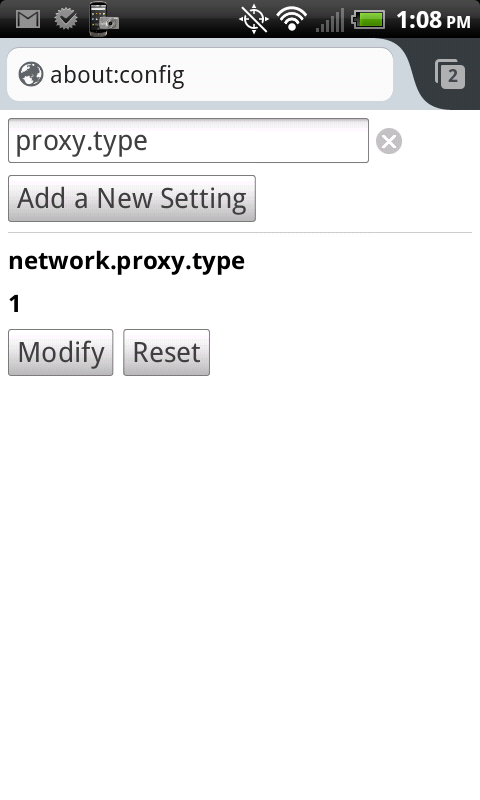
Step 8: Configure Firefox to use your newly created SSH tunnel. Open Firefox and type “about:config” in the address bar. Search for and set the following values:
- network.proxy.socks: 127.0.0.1
- network.proxy.socks_port: 8080 (or whatever port you chose in step 7)
- network.proxy.socks_remote_dns: true
- network.proxy.type: 1 (this tells Firefox to use your manual proxy settings)
Step 9: Done! There are a couple of things you can do to check if your proxy is working.
- Check your IP address
- When connected to a WiFi or mobile network that’s different from your Linux server’s network, google “what’s my ip” in Firefox and note your IP address.
- Open another browser (one that you haven’t set up to use the proxy) and do the same. The IP address in Firefox should match the IP address of your Linux server, while the IP address in the other browser should be your device’s external IP. The two IP addresses should not match.
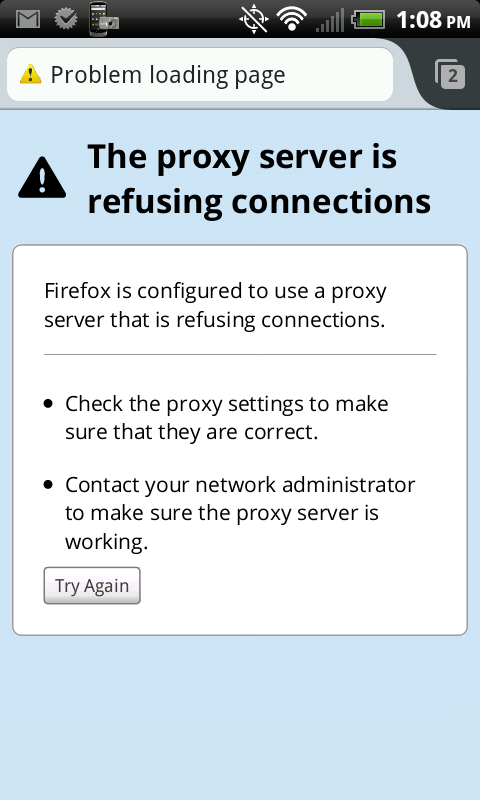
- Close the SSH tunnel and try to browse the Internet
- Open ConnectBot and disconnect the SSH tunnel by typing
exitin the shell and hitting the enter key, or by tapping menu and selecting “Disconnect”. - Open Firefox and attempt to browse the internet. You should see a proxy refused connection error.
- Open ConnectBot and disconnect the SSH tunnel by typing
Once you verify your new SOCKS proxy is working, you can be confident that your nosy fellow shoppers can’t see where you’re browsing. Unless, of course, they’re standing over your shoulder.


Cool Thanks! I’ve been trying to figure this out for a while. Where is the donation info?
Hey, that worked awesomely well and instructions are very easy. Thanks a lot!
Thanks, this really helped setting this up!
NICE!!!THANKS!
Amazing. I have been looking for a way to do this for ages! And it’s so easy to understand, thanks!
Thanks for this clear and easy solution. But how can one leverage the socks proxy settings, to allow the Play store or other non-firefox browser things to access internet resources?
@Trisha, I do not know of a way to do this without rooting your device. If you root your phone, you can use programs like SSH Tunnel or Proxy Droid to globally send all network traffic through the proxy.
Though I have not tried it, an alternative might be to setup a VPN and use your phone’s built-in VPN app to connect:
https://help.ubuntu.com/community/L2TPServer
Unfortunately, there appears to be a VPN vulnerability in the latest versions of Android:
http://www.pcworld.com/article/2092140/vpn-bypass-vulnerability-affects-android-jelly-bean-and-kitkat-researchers-say.html
504 Connect to deepweb.to:80 failed: SOCKS error: host unreachable
The following error occurred while trying to access http://deepweb.to/:
504 Connect to deepweb.to:80 failed: SOCKS error: host unreachable
Help!! I’m just being curious because everyone is taking about the deep Web…..
@Vanessa, you can only connect to an SSH server that you have access to.
The Deep Web is something unrelated to the task at hand 🙂
Nice and complete tutorial, but I now have an off-topic question.
How can I configure that SOCKS proxy behind another proxy (HTTP, using NTLM auth).
Explanation: at work we have to connect to an http proxy, and then use a NTLM (domain and user, with password) authentication. I know that can be done in Ubuntu using CNTLM and SSH, but if Android is based in Linux, what can I do?
Thanks in advance 🙂
If possible, set also network.proxy.socks_remote_dns to true to make also your DNS requests go through the encrypted tunnel.
This not only hides your connections but also where you are interested in connecting to. (And it allows to connect to host names defined only locally on your SSH host, interesting for targets in private networks.)
Thanks so much for the work. Just a quick note (maybe I missed a comment there): This also allows you to surf your internal network from anywhere in the world, but that might be a bit too obvious to state.
Great stuff, thanks a lot for the research and the very well written tutorial. It’s much appreciated!
jan
I know this is an old article…My forwarding was working but it suddenly stopped working on my cell phone. I have uninstalled both the connect bot and firefox and started from scratch and no go however it is working on my laptop.
Any Ideas?
Hi Tony,
What do you mean when you say “stopped working”? Are you sure ConnectBot has an active connection to your server when you try to browse the web in Firefox?
I just followed the steps on my Galaxy Note 3 on Android 5 (Lollipop) with the latest version of ConnectBot and Firefox for Android and it’s working great.
hi,
i have the same problem. it works just about 10 seconds and after this ConnectBot terminate the ssh connection. I dont think it is from server because it works fine when using socke in windows . something wrong in android . what do u think ?
wow,perpect ! but how can I achieve it by code and refuse those ads request of webs I surfering on ?
thanks
What is username@yourURL:port? No idea. I am using a public computer
Thanks for the howto
Would it be possible to do it through Tor?
So far, I cannot establish a ssh connection to a tor node using android. (I can do it with linux)
Thanks
how can i create a aplication to make socks5/or proxy from android. cand you help me?skype sunshine2b3
Which URL I’m gonna use?
Thank you.
Just to let you know 3-1/2 years later your instructions still work. Thanks.
Thanks for this tutorial.
this tutorial works again in 2019
tested now in android 9 pie with debian with SSH server
thanks
Here is another example written later (2020).
https://github.com/inwtx/Secure-cell-phone-browsing
купить фифа 18 – ключи стим дешево, купить рандом аккаунт ориджин
справный сайт http://hydra-onion-faq.com/
9 эффективных упражнений для красивых ног и подтянутых ягодиц
window 10 home – windows 10 pro купить, windows 10 лицензия
Still relevant today, thanks!
ConnectBot F-DROID link: https://f-droid.org/en/packages/org.connectbot/ (last version from 2019)
Or you can run the SSH command directly in the terminal but I think you need root?
ssh -D [8080 or any port like step 7] -N -f [user]@[server IP address]
Очень сносно оформлен дизайн casino 1хслотс, игровые автоматы часто появляются, дающие и с выводами денег проблем небыло ниразу!
И то что меня порадивало, 1xslots игровые автоматы надежно и безопасно!Игра приносит наслаждения!
fe94c4b